SECTION 20: BOTTOM WING SKINS
Jump to navigation
Jump to search
Build Instruction Updates
- N/A
Check for more recent updates here
Hints
Page 20-5
- Step 1: Just to be clear, if you are NOT doing a quick-build kit, then the W-1024B and W-1024B stiffeners were already made during section 13. Your stiffeners already have most of the holes drilled through them. You don't need to draw a line on them or do anything else for this step if you are doing a standard kit.
- Step 4
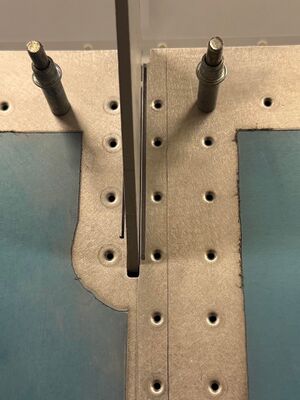
The outboard skin is “notched” and may require clearance to fit over the flap bracket without putting pressure on the skin. - Step 6: if you have a modern final-size-drilled kit then the only drilling that should be required in this step is (1) the six #19 holes along the inboard edge and (2) the match-drilled attach holes for these six nutplates.
- Step 7: you may find it easier to perform the next step (modifying the lap joint) before removing the skins.
- Step 10

The photo above is the location for a nutplate on the inboard rib (aft but forward of the flap bracket). In the photo it has not yet been match-drilled to #8. The aft-most #40 hole for the nutplate attach is called out in 20-5 step 9 not to be dimpled because there is no room for the dimple in that gap. You may need to grind down the aft end of that flange to allow room for a rivet to fit through there.

